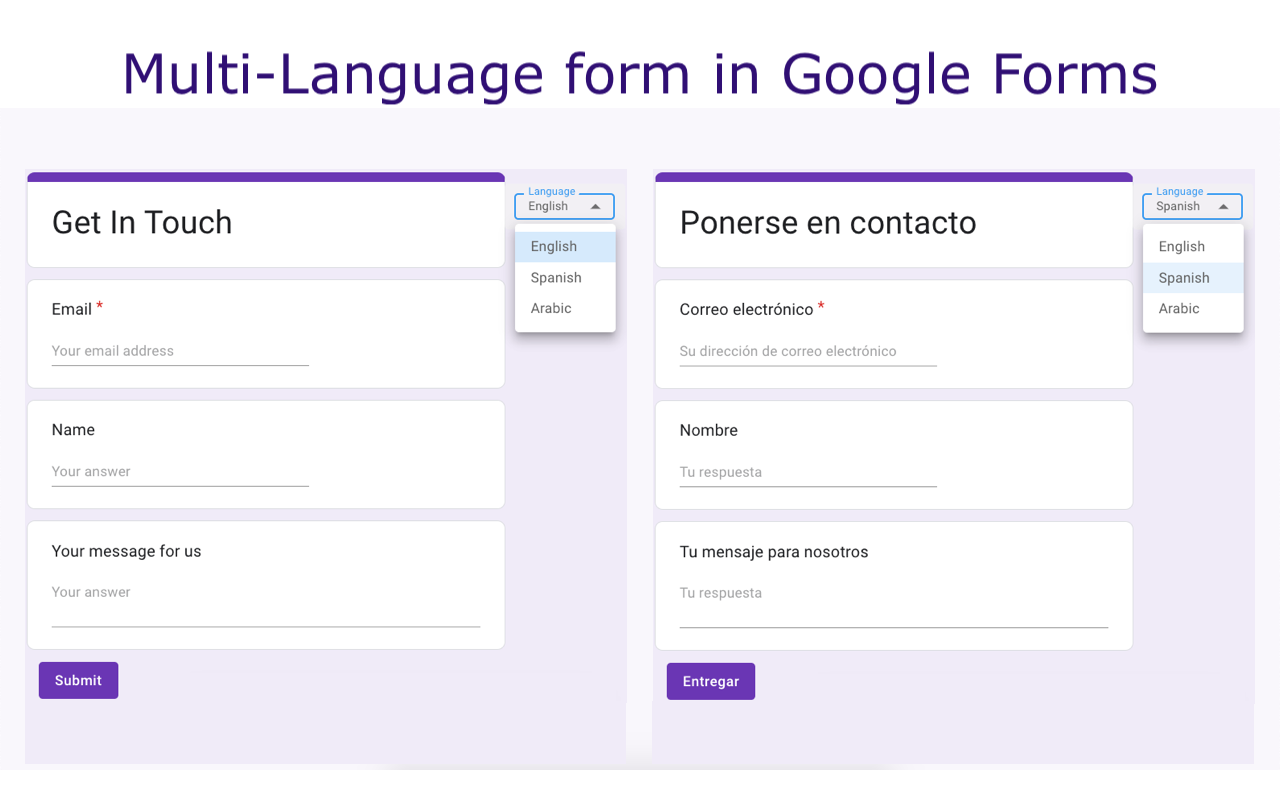
Sometimes, you need to create a Multilingual form or Multi-Language Form in Google Forms to involve more & more users from different countries or users who understand different languages to fill out your form. Instead of creating separate forms for each language, you can create a single form that supports Multiple Languages using the Pretty Forms Designer Add-on. Your form would also give you the ability to capture responses in different languages. Using the Pretty Forms Designer add-on you can create dual-language, three languages, or many-languages Google form.
This article will guide you on How to create a Multi-Language form in Google Forms.
Prerequisite: Install & Setup Pretty Forms Designer Addon on your Google form, if not already done. Then open the Pretty Form Designer.
Please follow the below steps to make a Multi-Language Form in Google Forms.
- Step 1: Click on the “Settings” icon button in the header of Form Designer. This will open the Settings Dialog.

- Step 2: Under the "Multi-Language Support" tab, switch on “Enable Multi-language support”.

- Step 3: Select Default Language from the list of languages. Like we selected English as the Default Language.

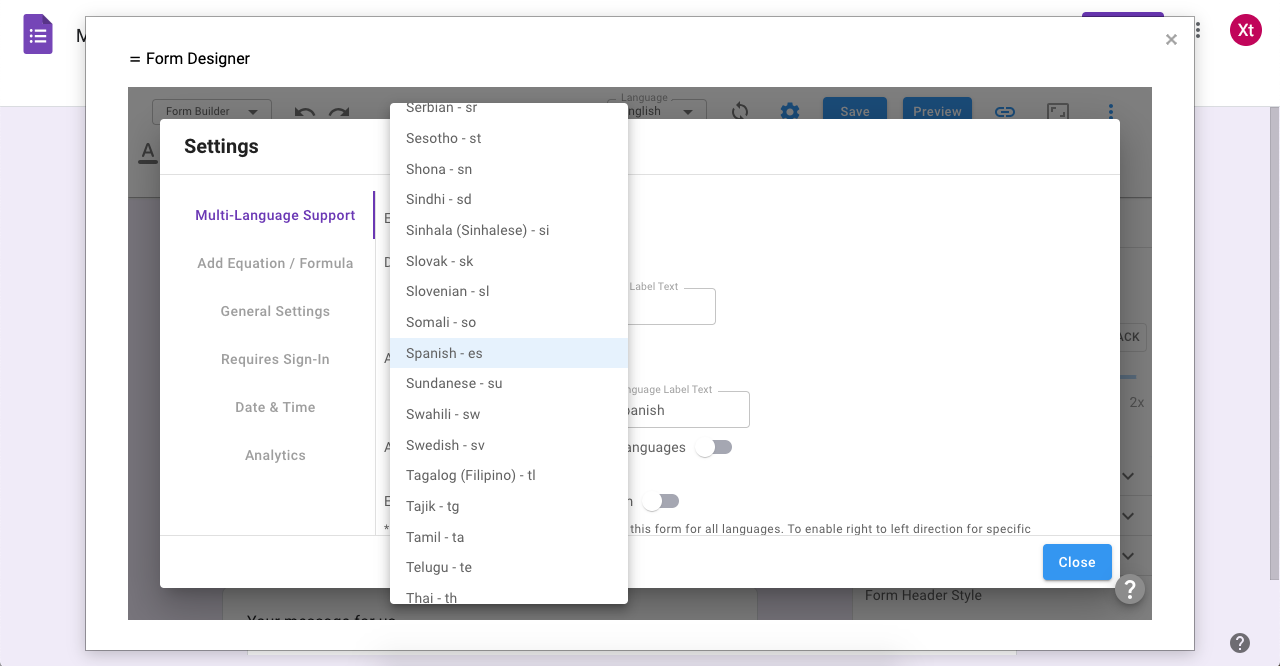
- Step 4: Add Additional Languages by clicking the “+” plus button, and choose Additional Languages. Like we have chosen Spanish and Arabic languages. We will also demonstrate the “Right to Left” option using the Arabic language.
- Step 5: Switch on the “Allow translation option to additional languages” option, this option will enable the Translate button to translate your default language form content to the Additional Language content.

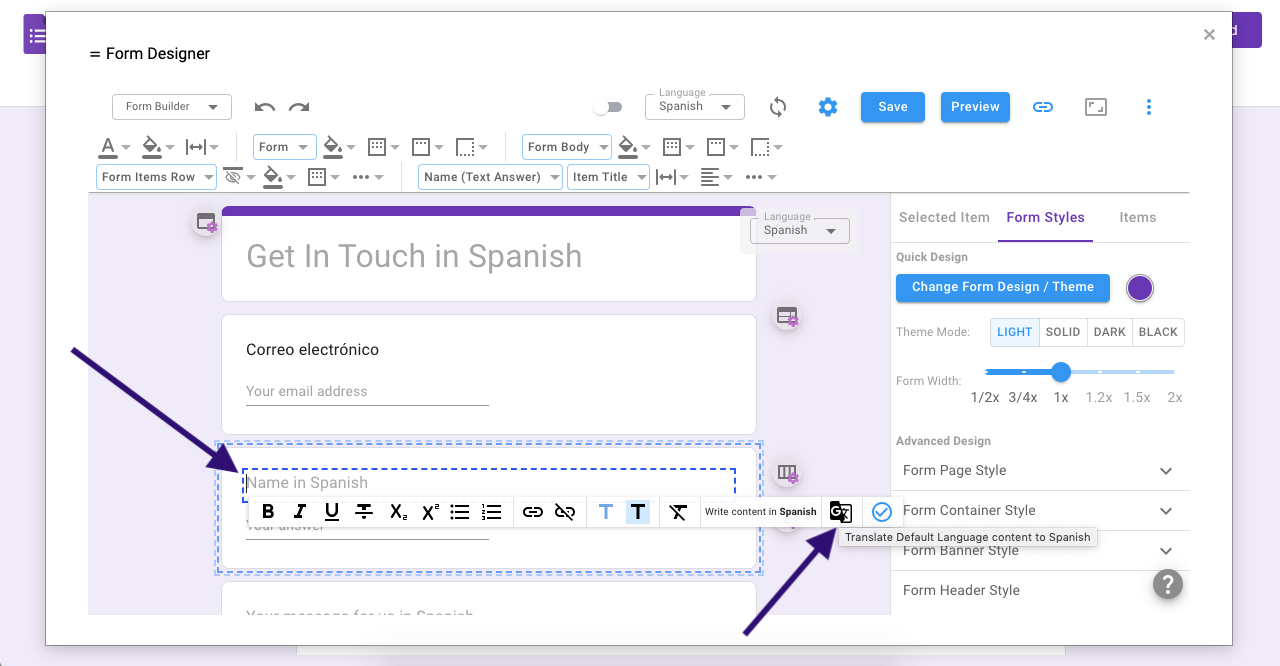
- Step 6: Select any Additional Language language from the language dropdown in the header of Form Designer, like we selected the Spanish language. This will show you your form in Spanish language having the placeholder text for Spanish language. In every text content, it will instruct you to add content “in Spanish”.

- Step 7: Click on text content like a question title, and write that question title in the selected Additional Language (in Spanish). Click on the “Tick / Check” icon button to mark it as done.
Instead of writing content in the selected Additional Language, you can choose the Translate option (guide in the next step).


- Step 8: You can also choose the translate options if you have enabled the “Allow translation option to additional languages” option in Settings. To use the Translate option, Click on text content like a question title, then click on the “Translate” icon button. This will auto-translate the selected question content to the selected language.

- Step 9: By using the above steps, write content or translate content for all text items like form header title, descriptions, all question titles, etc. in the selected language. Perform the above steps for the other additional languages, like we have added Arabic language, select the Arabic language, select question text, translate or write the content & click on the “Tick / Check” icon button.

Finally, Save your form and click the “Preview” button to check your form.